Using Print2Cut to cut stamped or pre-printed images

February 4, 2013

Have you ever wanted to cut out an image that is either already printed or stamped?  What about cutting photos?  Here is how you can do that with eCAL or SCAL3.  This would probably work with any program that has the print and cut ability.  I used a transparency, but you could use vellum or even office paper and a light box (or window).

  1. Open your file in eCAL/SCAL and size to the size that you want to cut.  I also change my cut shape to no fill and add a stroke.  Print with registration marks.  If I’m printing the same cut file in different sizes, I put each size on a new page and label the pages with the dimensions.Print2cut1
  2. I have been printing one shape, and then turning the transparency around to print another shape on the other end.  I also write the file name and the shape size next to each shape.
    Print2cut2
  3. Place the printout over a piercing mat (or a mouse pad) and poke all three of the dots in the center of the registration marks.
    Print2cut3
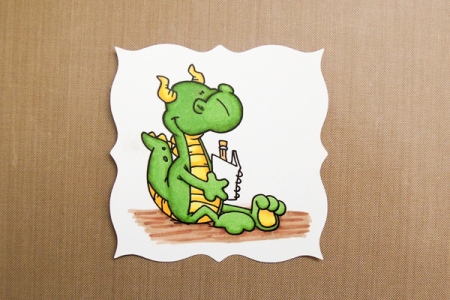
  4. Place your template over the  image you want to cut.  The transparency make it very easy to position (and also to avoid the stray marker near the edge of the image  ).
    Print2cut4
  5. Use a pen or a marker and place a dot in each of the three registration marks.  I like to number them, but that really isn’t necessary.Print2cut5
  6. Position the print on the mat.  Placement doesn’t need to be exact.  Just make sure that it isn’t turned sideways.  Click on the Print2Cut button and go through the Print2Cut steps like normal.Print2cut6
  7. The results:  One previously printed image that has been cut out exactly like I wanted.  Print2cut7

Path simplify and opening more than one SCUT2 file at a time

August 4, 2010

I found three more new features in SCAL 2.021.

One is the ability to open more than one SCUT2 file at a time.    If you click on the Import svg button or use Import from the file menu you can open multiple SCUT2 files.  Each one will open in a new page, but if you want them on the same page you can copy and paste them where you want them.

The font list is now alphabetical, no more lower case font names at the bottom of the list.

The other new feature is the ability to simplify your cutting files.  Here is how you use it.

  1. Select the Path that you want to simplify and from the menu use Path/Simplify.
  2. A dialog will appear.  You can change how severe the simplification by increasing or decreasing the threshold.  Click on Preview to see the change.  The number of nodes is shown above both the before and after images.  A higher threshold will result in more nodes being removed, but can cause distortion of the shapes.  Click OK when you like the results.
  3. This is what my simplified text looks like using the default of 50.  It originally had 623 nodes and the simplified letters had 194 nodes and will cut faster than the original.

I have updated my original post on the SCAL  2.021 update to include all of the features that I found after I wrote that post.


SCAL 2.021 Object Merge

August 3, 2010

I found another new addition to SCAL 2.021 today.  For those of you familiar with Inkscape, this would be the same as Path/Combine.  It doesn’t change the cutting lines, just the fill settings.  This is really useful when working with paper piecing files to combine pieces together into one layer.

Here is an example of how it works.

Shapes before using Object Merge

Shapes before using Object Merge

Shapes after using Object Merge


More new features added with SCAL version 2.021 – Updated

August 1, 2010

Craft Edge has released an update for SCAL2 here.  Here are the changes:

  1. The much asked for ability to export to svg files directly from SCAL. Files can also be exported as BMP and PNG.  All of these are found in the menu under File/Export.
  2. You can now open multiple SCUT2 files in different pages of the same file.  I have more detail on this here.
  3. The ability to use vector PDF files directly without needing to use another program to convert them to SVG first.
  4. Automatic simplification that can be adjusted or disabled (available through the menu: Edit/Preferences/Edit tab).
  5. Path Simplify has been added.  I have more detail on this here.
  6. Adjustable grid with snapping option.  Snapping is available in the View menu and the grid can be adjusted there or in the Preferences/Grid tab.
  7. More shapes have been added to the shapes library, including USA and a nice selection of flourishes (possibly music and symbols too, but I can’t remember for sure).  I also noticed new shapes in the basics shapes section.
  8. Each shape is now placed on it’s own layer, and when shapes are Unioned the layers are automatically combined.  If shapes are Grouped, they are all placed in a folder with the layers underneath.  If a shape is deleted, it’s layer is also deleted.
  9. Object/Merge has been added.  This is comparable to Path/Combine in Inkscape.  See this post for more information on this.
  10. A deactivate option has been added to the Help menu.  Very useful if changing computers or compatibility mode.
  11. The ability to move objects on the mat by clicking anywhere on them.  This was actually added in 2.013, but that version was removed from the download page after a day or two.
  12. Fonts are now in alphabetical order, even fonts with lower case names.